|
Introduction.
This design is relativly simple to execute yet the results are beautiful. Your initial out lay is small but you will be able to get the feel for wood carving and practice techniques you will need later
|
 Okay we are up and running
You will need the following items .
Okay we are up and running
You will need the following items .
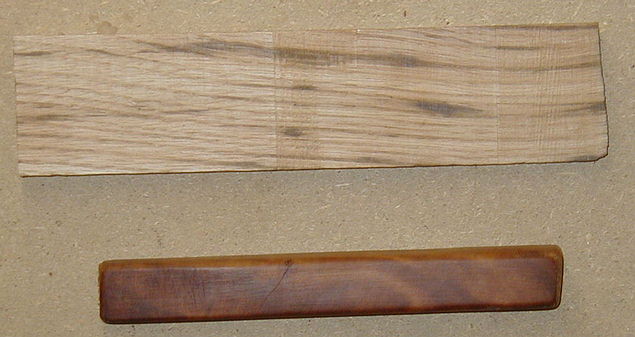
Two contrasting piece's of timber, I have used a piece of sweet chestnut 200mm x 5mm x 40mm.
A piece of Myrtle 160mm x 10mm x 20mm.
A fret or coping saw would also be handy, and a small drill bit, (plus the drill it goes in).
A knife, or small chisel, or a craft knife and a couple of blades would be alright. Two brass panel pins with the heads cut off, and a drill bit the same size as the panel pins.
To finish you will need an assortment of sand papers, plus wax or oil, whichever you prefer, but do not use varnish.
Oh yes!, and two small elastic bands.
|
 Stage one is to draw the Dragon. If you wish to stick the image to the wood and carve through it you will need three copies of the drawing.
One for each side of the wood (remember to draw one facing the other way, ie: turn the tracing paper over), and the third is for reference once you have cut through the other two.
You can use the design shown here, or design your own, but keep it simple. |
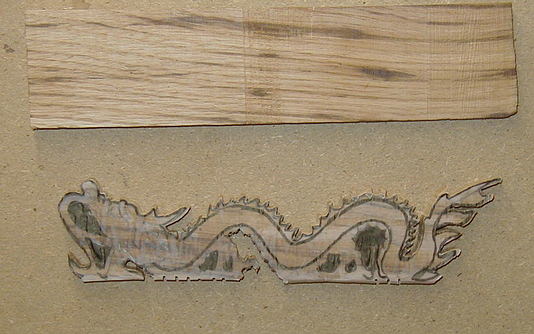
 Stage two: transfer or stick your design to the timber and allow to dry if necessary.
Stage three: using a drill smaller than the cutout areas, drill holes into the waste wood.
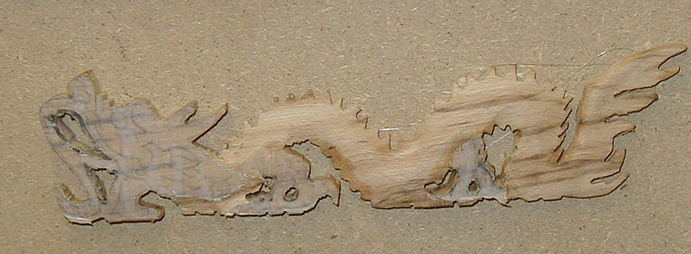
Stage four: take your saw and cut the outside shape of the Dragon, and the internal cutouts; this is why you drilled those holes.
Stage five: you can now round over the Dragons body, then cut in the lines for the detail such as the hair and eyes. Define these shapes, do not be afraid to use your knife. The cuts should have some depth, too shallow and you will not achieve the effect we are after.
The idea is to give the effect that each defined area, ie: the eyes was cut in using the bare minimum amount of cuts, and to leave behind the tool marks, or cut surfaces as part of the design. OK you may not achieve this first time, nor are you expected too. But as you progress and learn what you can do with your tools. This will soon come naturally, and you will be surprised at the difference between your first sculpture and your latest creation.
|
 A tip with the legs. Place your Dragon flat, and looking down on it you will see you have a double leg block. Cut about half way through the timber, defining the leg you are looking at. Remove the timber from the other leg, remember you are only removing half the thickness of the timber. You can clearly see this in graphic one. Turn the dragon over and reverse the process, take care, DO NOT cut through the wrong leg. You will now have a single leg that is in fact two. AM I GOOD OR WHAT!!
 |
 By now you should have the legs in place and the detail cut in on both sides.
Take the drill bit that is the same size as your headless panel pins and drill two short holes in the bottom of your dragon, about a quarter of the Dragons lenght in from each end, and glue in the cut ends of the panel pins.
Right, while this is drying take the piece of wood that is your base and sand over the top edges as you go, making this nice and smooth. Do not round the bottom.
When you are done, pick up you Dragon with the sharp end of the panel pins sticking out and holding it centrally over the top of the prepared base, press it gently but firmly so it indents the wood as your guide.
Hopefully you are still with me, if you are then we are nearly finished. With the drill bit again drill two short holes at the indentations. Put a little bit of glue on the ends of the panel pins and push into the holes. If it is a little loose use a tiny bit more glue, and using the elastic bands slip them over your base and sculpture in secure places and bugger off for a cup of well earned tea while it dries. |
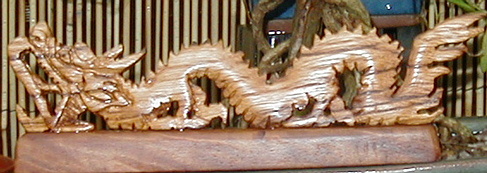
Good; you remembered to come back. Your Dragon is now sat on its base looking rather good, but there is that little something it still needs.(Yes you can take the elastic bands off now).
Yes! you are right, take the fine grade sand paper you last used on the base to get the smooth finish and fold it so the sanded side is inside. Yes! sanded side inside. Now rub your sculpture gently but firmly with this over the flat surface, do not try and go into the cut areas. You will hopefully notice that the rubbed area has a nice shine, yes!.
This is what we call a trick of the trade.
Now, when you apply your wax, or oil your sculpture will look aged because the areas you have not buffed will absorb the finish at a different rate.
Your Dragon is now complete.
If you have any questions or problems let me know and I will endeavor to answer you and put them right.
I can also alter this page if I feel I need to.
Thankyou!
|
 Your Guide
|
|

