|
On this page we shall age a carving to give it that antique look
A little information and research goes along way
I cannot stress too much the importance of getting to know your subject. You cannot possibly expect to carve anything accurately if you do not know anything about it.
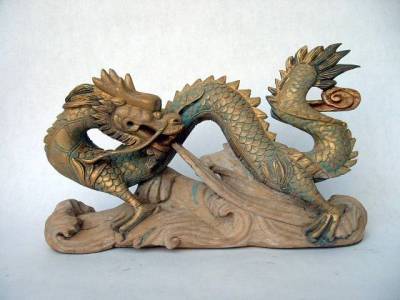
The Dragon you see here is a reproduction of an antique Chinese wood sculpture. Sculptures of this type were usually architectural rather than ornamental and were a spiritual aspect of daily life, so the forms with the Dragon would have specific significance to the dragons spiritual persona and the culture and time to which it belongs.
The Dragons breath, clouds and water all have there roots in the mythology of the spirit that is a Dragon, and the inclusion of pearls, bats, lotus shapes and flames to name but a few of the common symbols all have there own meanings.
To look upon one of these sculptures is a bit like reading a book, but first you have to learn to read the language it was created in.
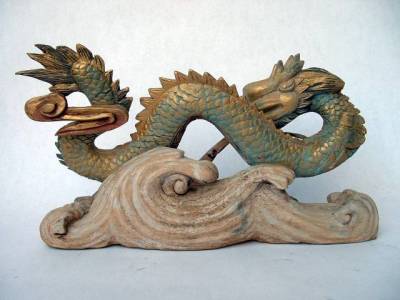
This Dragon would not have been a free standing sculpture,you can tell this just by looking at the rear view. The artisan who created the original did not waste their time carving in the legs at the back as they would not be seen or detrimental to the sculpture's form, you how ever can carve these in you just have to copy the legs from the front should you so wish.
|
|
|
First a few words on this Dragon
Front view
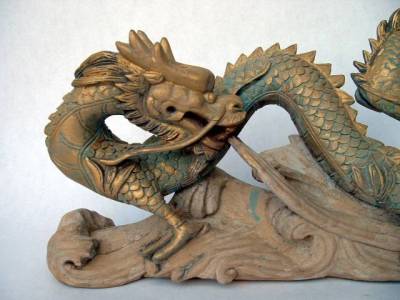
If you intend to sculpt this Dragon you should note the position of the head. Folded back onto the body like it is will present you with the problem of carving in to the body. Believe me you will need to practice carving this as it is not as easy as it looks.
If you move the heads position so that you get a clear all round view it would make carving it a lot easier.
A TIP
You could lift the head so that it is looking up over its back without losing the spirit of this Dragon and omit the stylized breath |
|
|
Equipment.
You will first need to have sanded down your sculpture. make a good job of it as any rough areas will be all to visable when you have finished your work.
To get the aged look of the dragon in the pictures is very simple you will need the following items
Under coat
green paint ( dark green is best )
some fine sand paper
gold paint metallic.( you can buy small pots of this from craft shops, you will not need a lot )
Paint brushes to apply the under coat and paint
a small sponge
|
|
|
Technique
Apply undercoat to your dragon and allow to dry make sure its smooth if not lightly sand.
Next apply the green paint. It will look terrible but do not worry lightly sand and then apply the next coat of green. You should only need about two coats of paint but if it needs a third do so.
Now with the fine sand paper wraped around your sponge LIGHTLY sand ONLY the raised areas, do not sand into any recessed areas.
lightly wipe of the sculpture with a damp cloth and allow to dry. Take your gold paint and pour a little into a flat tray ( the lid from an old marge tub will do )
Lightly dip your sponge into the paint and the dab it onto your sculpture do not be tempted to put a lot on in one go, if you need to build up the gold in one area do it slowly, step back from the sculpture after each application. Do not coat all the green areas with the gold look at your sculpture if an area needs more paint then apply a little more. Just remember to apply only enought to give the finish you require
|
|
|
|
|
|
|
|
|
|
|
|
|
|