|
A little bit of the history behind the sculpture
This dragon design is from Japan and is a very small version of a dragon fountain in the court yard of a Japanese temple.
I first came across this sculpture in the form of a money box and it inspired the forms that I carve today.
You will have to work a little for this sculpture. In order to carve your own sculptures you will need to develop some basic skills.
These will only come with practice, so you might as well start today.
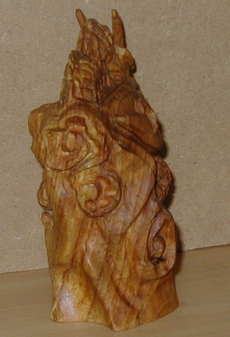
Side view .........Front view .............Side view
|
|
|
You will require.
First, to fit the size of wood block you are using draw the three views you see here. Yes, draw the Dragon yourself, you can download and trace the photos if you wish, but the intention of these lessons is for you to develop the skills to work with your own ideas.
This means that you should be able to draw a simple plan of that which you wish to carve, and to start to develop the ability to visualise the whole of your sculpture.
If you wish to carve the same dimensions as myself you will need,
A piece of hard wood with the minimum dimensions of 3-1/2 x 6 x 5-1/2 inch, for a dragon without a base. With a base you should add another 1 to 1-1/2 inch to the height and aim for at least another 1-1/2 inch on the diameter.
|
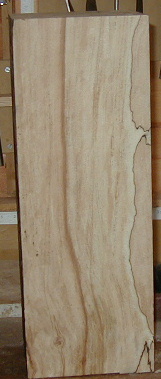
Spalted Beech
Right, here we go. I am starting with this Spalted Beech block. It will make two of these dragons with thier bases.
You can use any hard wood you like but if I may make a suggestion, if you do not have much experience working with wood then ask when you are buying it. Ask for a timber that is easy to carve such as lime wood, butternut or simular.
|
|
|
|
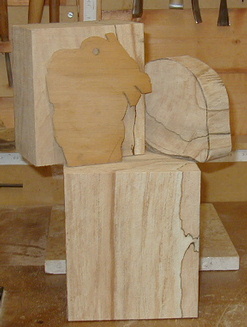
Cutting out
With the Beech block cut in two, I took one of the blocks and cut it to size. This has given me enough timber for the base. And some trimmings that could be used to carve the Dragon in the first lesson. |
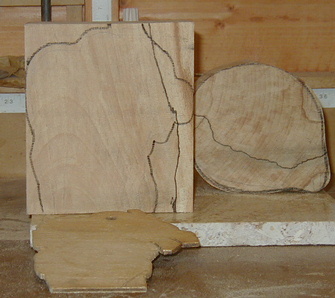
Templates
As I sculpt this Dragon regulary I have a template which I use to draw around. You will of course transfer one of the side views to the block then draw a rough out line around it give yourself about an extra 1/4 to 1/2 inch lee way. Copy on the other side. Center the front view in the middle of the block ,lining up the main points with those on the side.Once you have drawn out the main body shape mark the areas for the legs and the tail then cut out the outline and block in the limbs etc.
|
|
|
|
Head Detail
Right, by now you will have blocked out the body parts. These should be; the head, and top coils of the dragon that protrude above the clouds. On the right hand side of your block you will have one leg and the curled tail, on the left hand side you will have two legs. Correct !!.
Good now if you have not already done so draw in the cloud shapes and if you need to redraw the dragons parts do so now.
Note
Do not worry about the scales or small detail yet just get the outlines in the right places. |
The dragons back & right hand leg
The next stage is to shape in the dragons head and body. Do not cut right up to your lines, leave a little space and do not under cut the dragons horns yet.
When you are happy with the body and head's shape you can move on down to the rest of the dragon. To cut in the legs and tail you will need to also cut in the cloud shapes. Cut deep, do not be afraid to be bold, if your shapes are to shallow the carving will not work.
Okay, you now have the dragons form and the clouds cut in, and you are ready to turn it into a recognizable sculpture. Shape over the dragons parts using chisels and gouges that are the nearest in size and shape to the shapes you are cutting. MAKE SURE YOU KEEP YOUR TOOLS SHARP.
If you are using a rotary carver use a thin straight cutter to define the shapes then round them over. DO NOT use a carbide burr on the legs and tail unless your sculpture is of a substantial size.
|
|
|
|
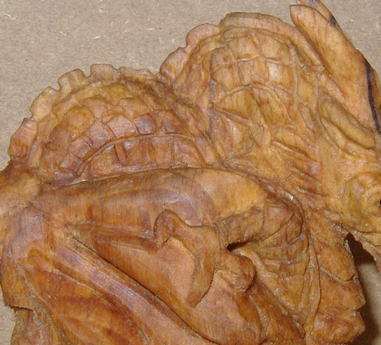
Left side view
Carving the scales.
Mark the scales on the legs and tail.
The easiest way to do this is to draw two lines from the elbow to the shoulder and one from the foot to the elbow, curve the lines slightly with the limb's shape, then at an angle draw the crossing lines.
Take a fine flat chisel and cut down into your lines, the chisel must be sharp; the aim is to cut not crush. Once you have cut all your lines you take a small chisel and starting about 5mm in from the start of your scale, cut down at an angle to the back of the next scale removing the wedge, repeat until you have completed all the scales.
|
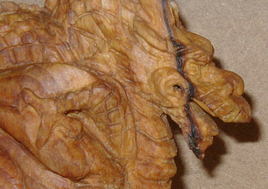
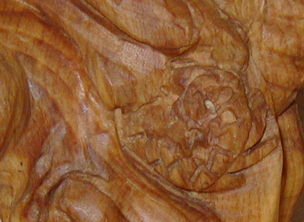
The Tail
Detail of the tail.
You can make the tail curved as shown, or play with the design, it is up to you.
|
|
|
|
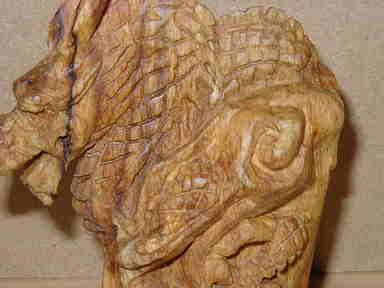
Head and top body
This is the same process as the rest of the body.
It would be a good idea to cut in the ridge spines first and then cut in the mouth. Do all the shaping around the mouth before you under cut the chin. The same applies to the horns. |
|
Sanding your dragon
Okay you have carved in all the detail and now would like to finish your dragon off.
Start with a course sand paper and work your way down to fine.
Looks good !!
Now apply some oil to your carving, you may need to use a brush to get into all the detail.
Wipe of the excess and leave over night to dry.
You will need to repeat this about five times.
Leave to dry and then apply your wax.
A tip.
When you have applied two layers of oil as above, apply the third, and while it is still wet take a piece of fine wet and dry and rub over the cloud part of the sculpture; do this each time until you have finished oiling.
You will now have a very smooth glass finish to contrast with the dragon that looks great.
|
|